
In Part 1, I explained the context around the need for provisioning machines within your infrastructure, to call an Asset Management System. This system is referred to as the SOAP Service or Web Service throughout the post.
To recap on Part 1, our Web Service requires the following inputs:
- HostName
- CPUs
- RAM
- Storage
- Department
The next step, now that we've actually created the shell for our workflow, is to edit the Scriptable Task that already exists in the workflow and change it to meet our needs:

When editing the task, one case easily see how to obtain the Custom Properties we are looking for as well as the Hostname:

Declare the variables we are going to use
In the next image below, note the Property "VirtualNebula.DepartmentName" in the script. This is the Department as required by the SOAP Service.
The user is prompted to enter this information when requesting a new machine.
I will cover this next.
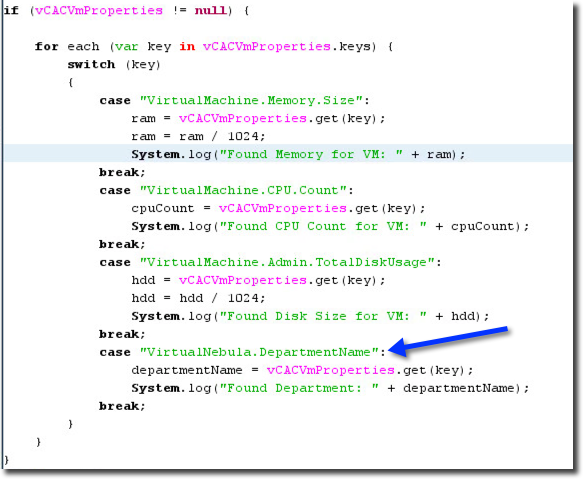
Iterate the properties of the VM, and look for the ones we are interested in
For the custom property "VirtualNebula.DepartmentName", I simply added a custom property to the relevant Blueprint, after creating the relevant entries in the Property Dictionary:

Create a custom property on the Blueprint(s) (or use Build Profiles) associated with the integration required

I simply created a DropDownList entry in the property dictionary for the associated custom property to make the display friendly and to limit input.

For the image above, this is what users would see when requesting a machine - they would need to select the relevant Department that their machines belong to - and this information would be passed on to the SOAP Service.
Back to the vCO Workflow, I managed to gather all the relevant information as depicted above in the Scriptable Task. My next step is to ensure that we translate this information to the SOAP Service.
I used a bunch of attributes and then added the "SOAP" Service to the Workflow:

I've not covered much more on the SOAP Service, since mine is really just a dummy call and doesn't do anything functional. I used an existing SOAP Service simply to show how it is done.
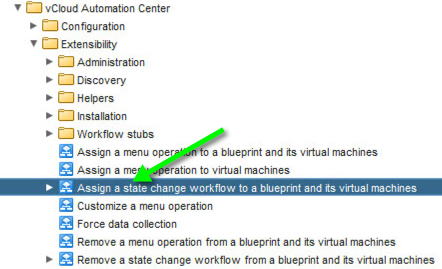
Moving on, we now need to associate our new Workflow with the relevant Blueprint and state:
We do this by running the "Assign a state change workflow to a blueprint and its virtual machines" workflow in vCO:
In the next step, running the workflow, we select the "MachineProvisioned" state.
This means that our workflow will be called after the machine has been provisioned successfully, which is what we want:

For the next step, select your relevant vCAC host (IaaS host) that you would have already configured if you read my previous post on Running vCO Workflows via vCAC. This is two articles prior to this article if you need reference.

Next, select the relevant Blueprints that you want to associate with the SOAP Call.

In the next step, we select the Workflow we just created. This is where the binding all happens.
So, we have elected to call our "Create Asset on Provision".

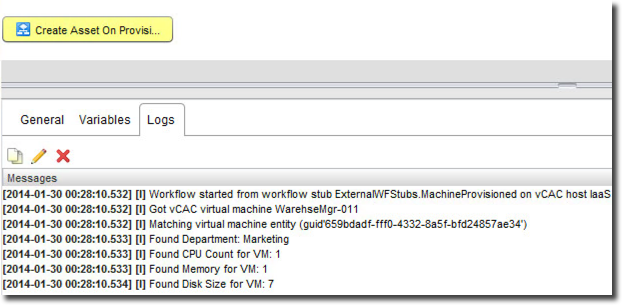
In my next step, I requested a virtual machine using the Blueprint I selected above, as an end user.
I waited for the machine to commence provisioning and monitored the vCO UI for changes.
This is what I got once the machine was provisioned in my Logs, meaning the Workflow ran, got the relevant properties and would have progressed to calling the SOAP Service:
I trust this post helps you along your way to integrate vCAC with pretty much anything that has a SOAP / REST API using vCO.